


Harnessing AI to Solve World Hunger
October 30, 2023
The Importance of Testing in Programming
November 13, 2023

Today I will be walking through the steps to creating your first Microsoft Teams app using the "Teams Toolkit" extension within "Visual Studio Code".
What will I need before I get started?
- Node JS v14 - v18
- Visual Studio Code (IDE)
- An understanding of React JS (Optional)
- An understanding of basic Javascript/Typescript and HTML (Beneficial)
Right with that all being said... lets get you setup.
Step 1:
For the first step you will need to open "Visual Studio Code" and navigate to your extensions, then search for an extension called "Teams Toolkit" and click install or click here and install it from your browser.
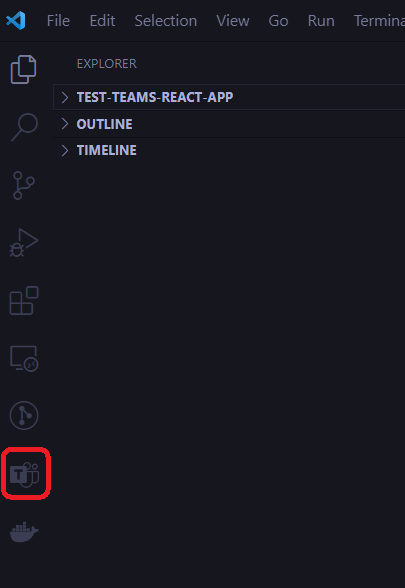
Step 2:
Once installed you should see a teams icon appear in your "Visual Studio Code" on the left hand toolbar, like this:
Step 3:
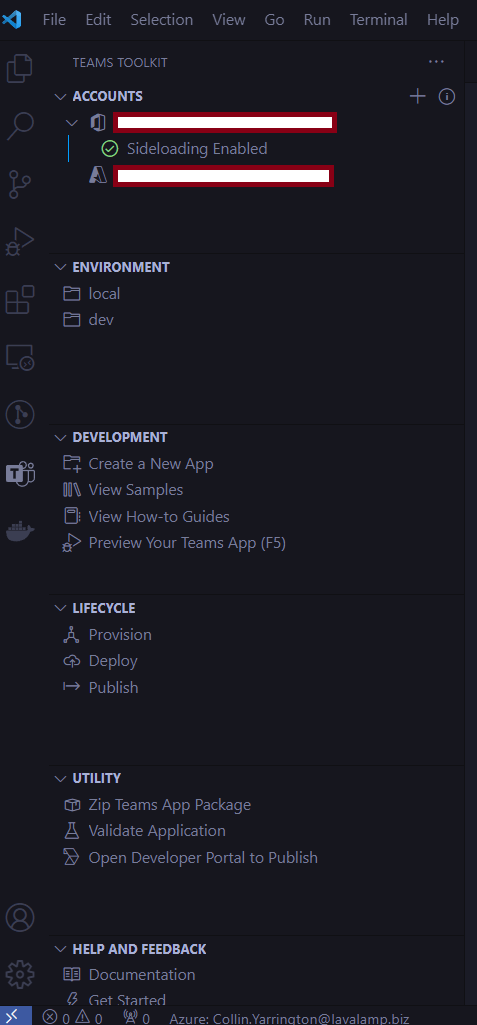
Upon clicking the teams icon you should be provided the following options:
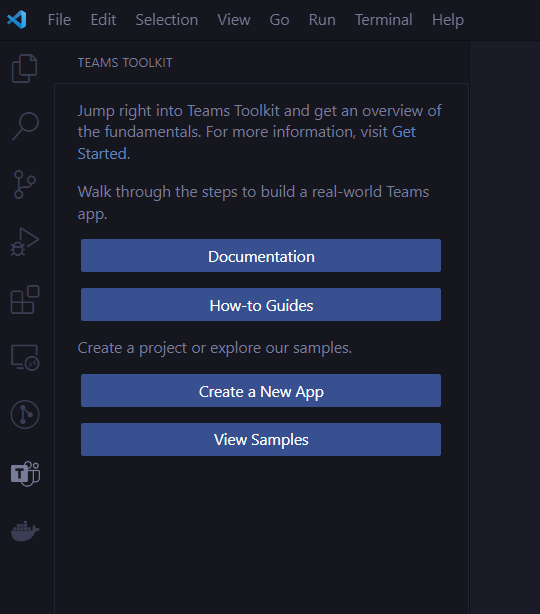
As you can see in the above image you have direct access to:
- Documentation - This is Microsoft's official documentation that makes it easier for you to find out any information that you may require as it is maintained and updated with each version of the Teams Toolkit.
- How-to Guides - This is also part of the documentation but it allows you to get an overview of how certain things are achieved in the teams environment.
- Create a New App - Is what we will be working with. Here we can generate our first teams app.
- View Samples - Is a list of Microsoft approved samples of pre-built apps.
For now we are just focusing on the "Create a New App" option.
Step 4:
Now we will click on the "Create a New App" option, You should see something like this popup at the top of you screen:
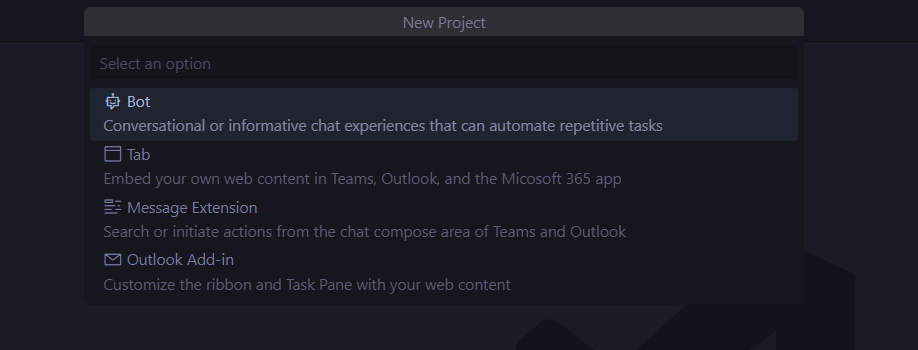
As you can see there are a few options to choose from, For this example I am going to stick with the "Tab" option...
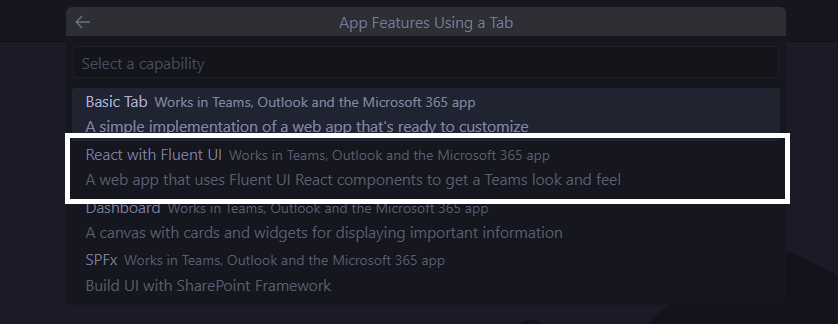
Step 5:
After selecting the "Tab" option you can go ahead and click the "React with Fluent UI" option as shown in the screenshot below:
Step 6:
Select your preferred programming language, such as listed below:

For me I am going with TypeScript (No real reason) then you can go ahead and select your Workspace folder. You can choose any location as long as it is within the windows environment (This wont work in a WSL environment).
Once you have selected the Workspace folder you will then be prompted with a text box requiring that you provide your app with a name. You can name it anything your heart desires.
Step 7:
Once your app is done generating a new Visual Studio Code window will appear with your project directory that you selected.
Step 8: (You only really need to do this once)
So far you have generated your app and now we would like to run it locally to test it. However, you will need to sign into the "Teams Toolkit" extension. This is simply done by clicking the "Teams Toolkit" icon, and navigating to Accounts and login using your M365 account and Azure.
It's important to note that you will need to have side loading enabled for this to work. If you do not have side loading enabled here is a resource to follow to get it setup and working.
Step 9:
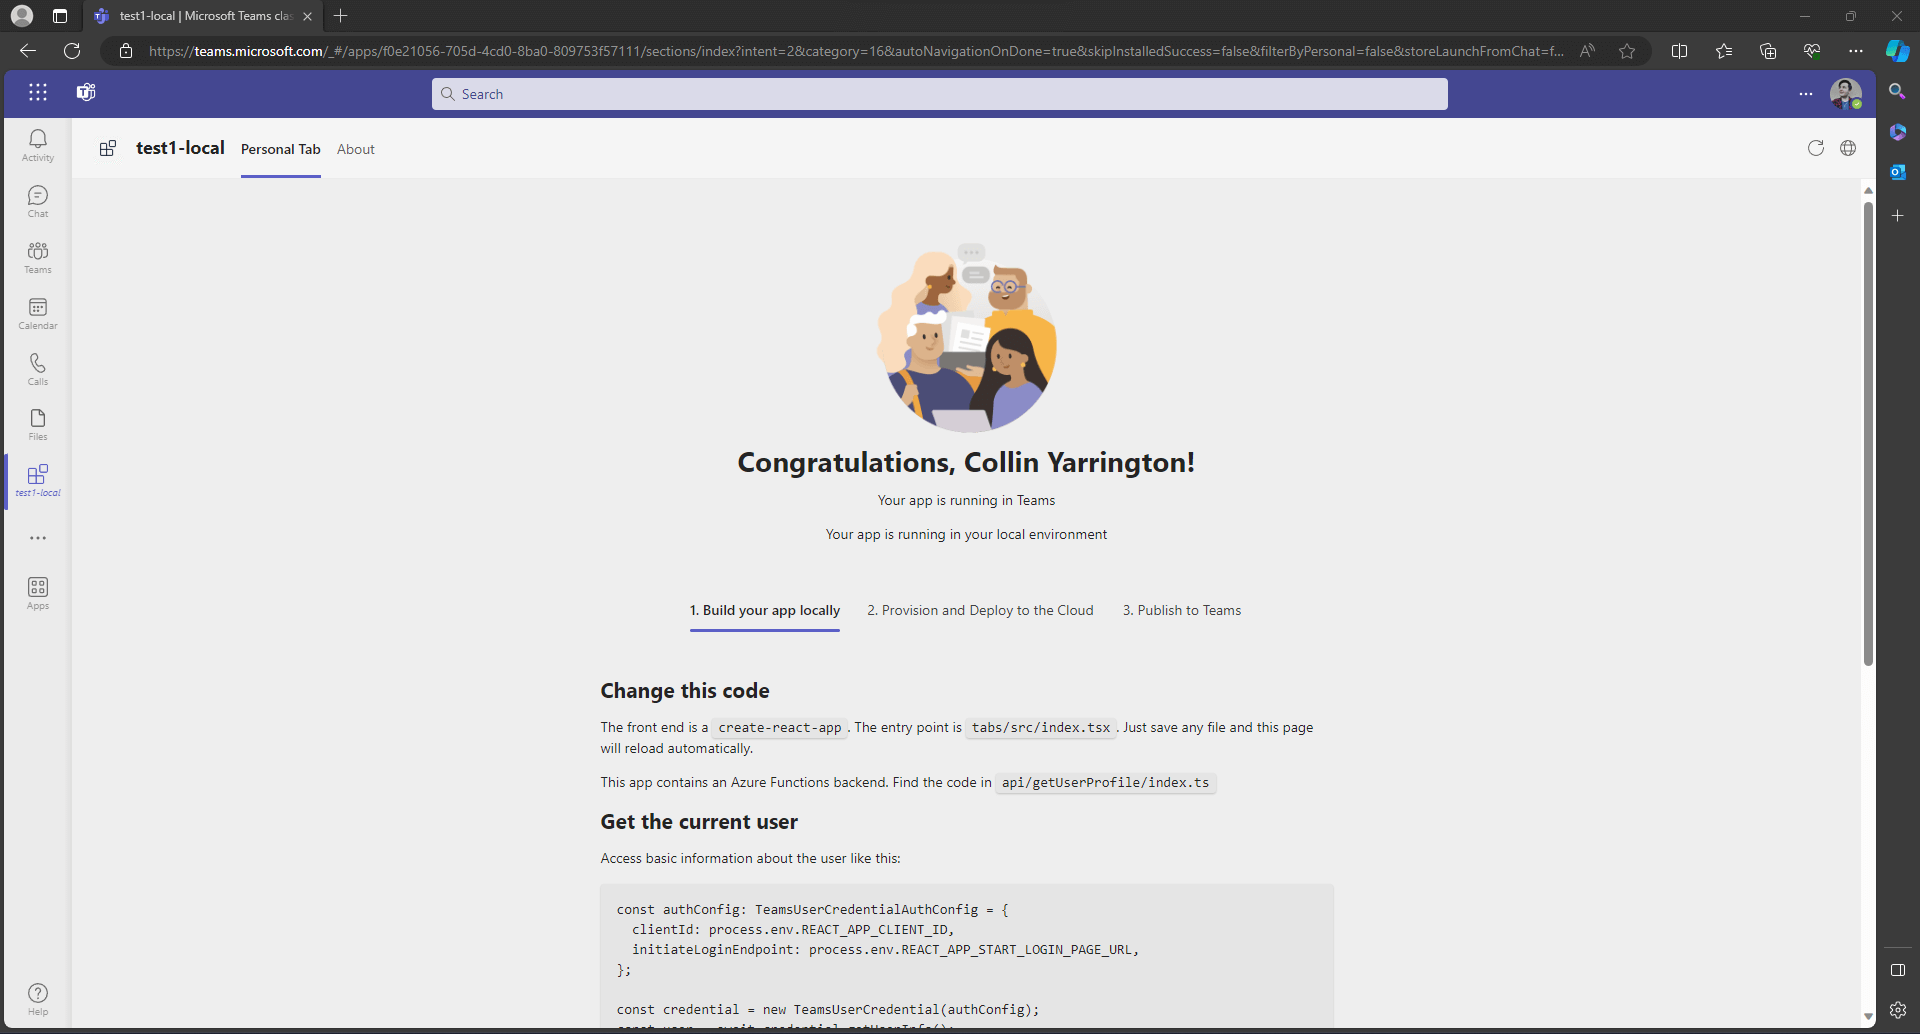
Once you have completed the setup and have sideloading enabled you should just be able to run you application in debug mode by simply pressing your F5 key.
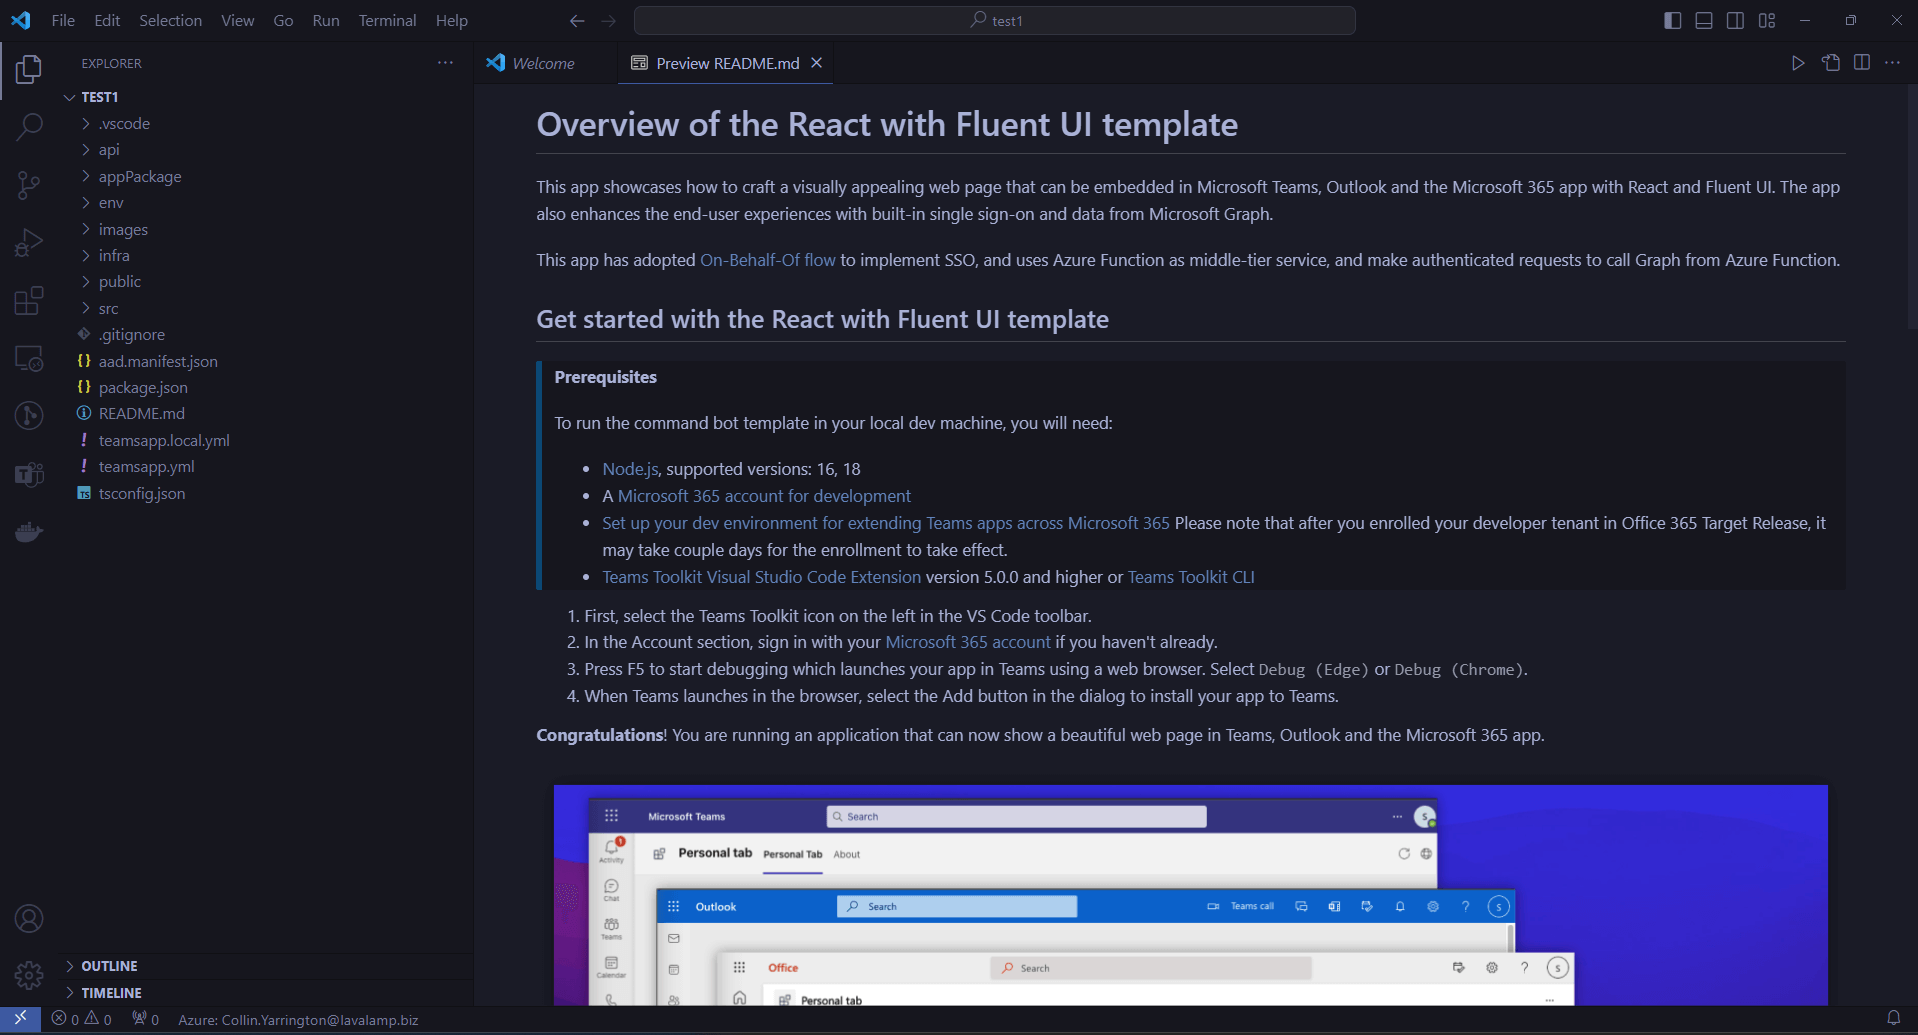
By this point you should be seeing browser window open up with the option to add your application to teams after your application compiles. Once you have added your application your application will open automatically and you should see this:
If you are seeing this then Well done! you have created your first Microsoft Teams React Tab App. If you are still battling to get your environment setup I would recommend that you retrace the steps or go straight to the documentation as it may be a specific issue with your environment.
I hope you found this basic overview of the setup helpful.


