
Misconceptions About Software Development
September 26, 2022
Laragon: Fast Website Development Environment For Windows
October 24, 2022
In this blog I’ll be going through the steps to making a chat bot in Laravel using Twilio’s Whatapp service and how to setup your sandbox environment for testing your chat bot using Postman.
Initial Setup:
Step 1:
You have to have an account made with Twilio in order for this to work. If you don’t have one please register here.
Step 2:
We will need to make use of some packages to assist us in the process of building the chat bot. The following are the composer packages that you will need to run on the Laravel application that you are working with.
$ composer require twilio/sdk
$ composer require guzzlehttp/guzzle
Step 3:
We need to setup our .env file. So that it can make use of your account specific “ACCOUNT SID” and “AUTH TOKEN” which will be used to authenticate the requests using the Twilio SDK composer package we installed in the previous step.
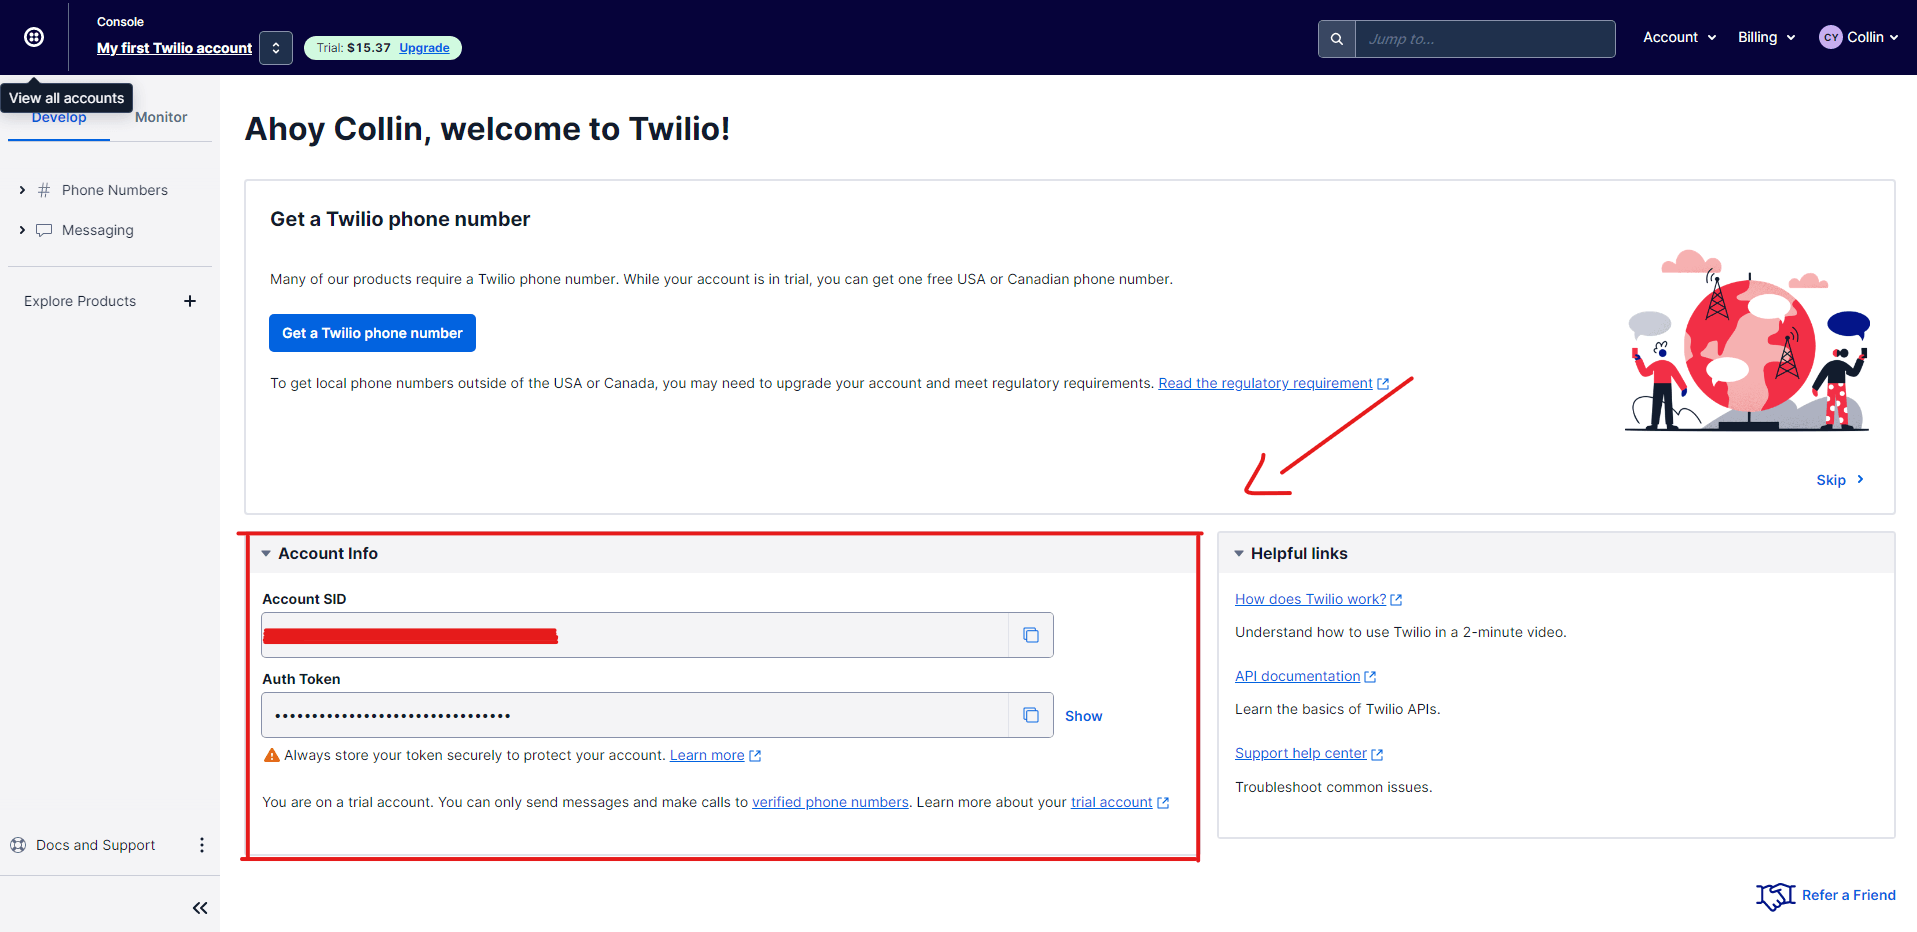 You need to add the following to you .env file:
TWILIO_SID="YOUR_ACCOUNT_SID"
TWILIO_AUTH_TOKEN="YOUR_AUTH_TOKEN"
Now lets set up your sandbox:
We are going to setup our sand box so that we can use the mobile number they provide to test with. In your regular production environment you will need a Twilio Approved Number in order to make use of their WhatsApp service. Thanks to Twilio's API we are able to prototype our code before even having an Approved Twilio Number.
Step 1:
In order to setup your sandbox you must navigate to your accounts Twilio console dashboard in order to start the process.
Step 2:
There you will see a menu on the left hand side of the screen. Expand the tab that says "Messaging", Then expand the tab that says "Try it out". There you should see a tab that says "Send a WhatsApp message".
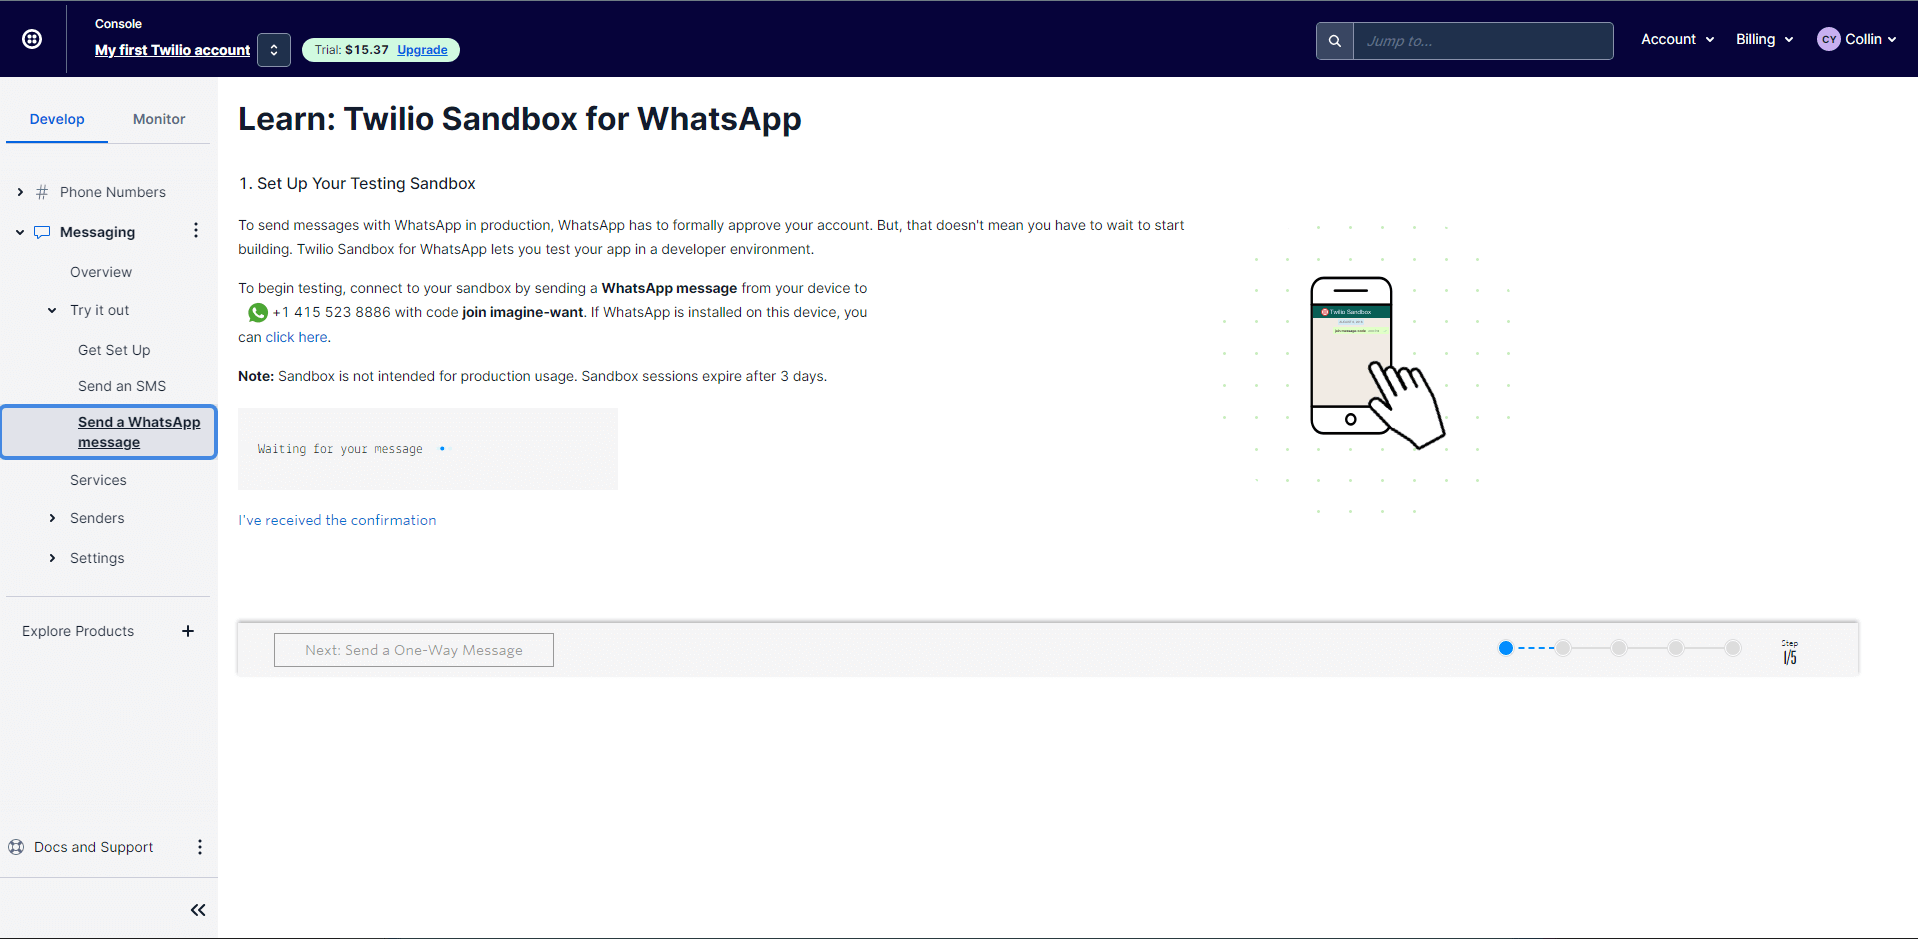
To sum it all up for you. On this screen you learn a bit about the Twilio API and how it handles requests. Besides that we get provided with a number that is Twilio Approved and ready for you to start prototyping with. To get setup you will need to send WhatsApp a message to the number they provide like in the above example (I.e +1 415 523 8886) your message must contain the word " join <key-phrase>". Once you have done that you should receive an automated reply saying that it was successfully setup.
Important note! If you setup your sandbox. After 3 days you must reinitiate the sandbox setup. From my experience the key phrase doesn't change so all you would need to do is resend the message (" join <key-phrase>").
That's all! You have setup your sandbox correctly then.
Step 3:
All that's left for us to do is to add our Twilio approved number to the .env file.
TWILIO_SID="YOUR_ACCOUNT_SID"
TWILIO_AUTH_TOKEN="YOUR_AUTH_TOKEN"
TWILIO_WHATSAPP_NUMBER="+14155238886"
Now lets write the code for the chatbot so that it can take a message and send back a reply:
Step 1:
In-order for us to process the message, we need some where to process the incoming message and for us to send back a response. So we will need to create a controller to handle all the processing of the message.
$ php artisan make:controller MyFirstWhatsAppTwilioChatBotController
Step 2:
Now that we have a controller lets setup the two functions we will need:
<?php

namespace App\Http\Controllers;

use GuzzleHttp\Exception\RequestException;
use Illuminate\Http\Request;
use Twilio\Rest\Client;

class MyFirstWhatsAppTwilioChatBotController extends Controller
{
    // This function is used to listen for incoming messages
    public function listenToReplies(Request $request) {
        $from = $request->input('from'); // This is the number that sending your bot a message.
        $body = $request->input('body'); // This is the message you get from the number sending the message to the bot.
        try {
            if($body == "hello"){
               $message = "Hello\n";
               $message .= "This is a custom message that you can set\n";
               $this->sendWhatsAppMessage($message, $from);
            }
        } catch (RequestException $th) {
            $response = json_decode($th->getResponse()->getBody());
            $this->sendWhatsAppMessage($response->message, $from);
        }
        return;
    }

    // This function is used to send the message we complied in the
    public function sendWhatsAppMessage(string $message, string $recipient)
    {
        $twilio_whatsapp_number = getenv('TWILIO_WHATSAPP_NUMBER');
        $account_sid = getenv("TWILIO_SID");
        $auth_token = getenv("TWILIO_AUTH_TOKEN");
        $client = new Client($account_sid, $auth_token);
        return $client->messages->create("whatsapp:$recipient",
            array(
                'from' => "whatsapp:$twilio_whatsapp_number",
                'body' => $message
            ));
    }
}
Next thing for us to do is for us to setup a Webhook for chat bot:
Step 1:
Navigate to your "routes/api.php", Then add your controller to the routes within that file.
Route::post('/chat-bot', 'MyFirstWhatsAppTwilioChatBotController@listenToReplies');
Note that we set the request type to post. When Twilio gets a message from a number it will post to this route with the phone number that sent the message as well as the message they sent.
Now that we have it all setup lets serve our project and start testing the whole setup using postman:
Lets get our application served. You can do so by running the below command in your applications root directory.
$ php artisan serve
Now that we have our application served to our local environment we can test to see if it works. For that we will need to have post man install on our machine. Here is how I set it up:
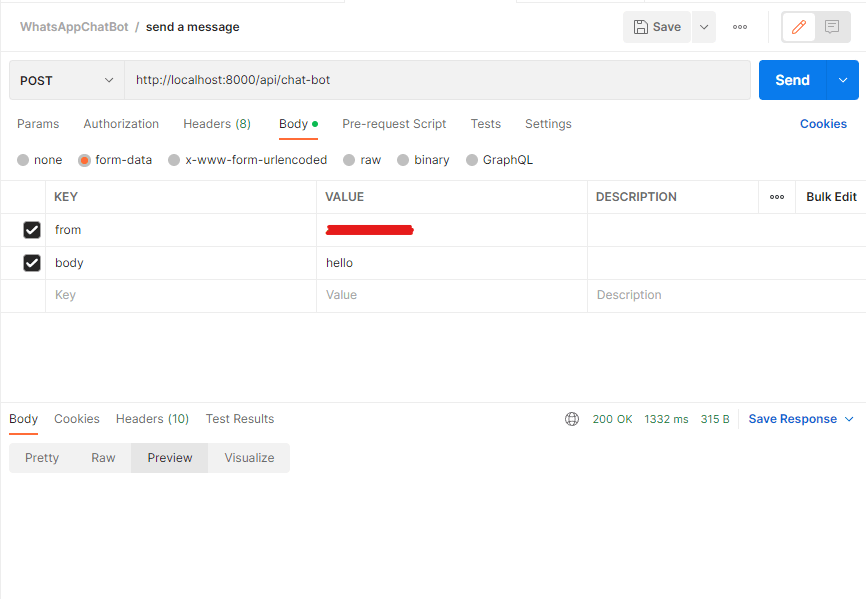
When you click "send" you should receive a message from the number you started your sandbox with on WhatsApp and it should contain the message you set within your listenToReplies() function.
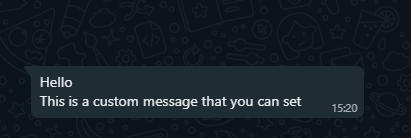
So in a nutshell this is how you test your WhatsApp chat bot.
Conclusion
In this blog post you learned the following:
- You learned how to setup your applications with the correct packages to make use of the WhatsApp API from Twilio.
- You learned how to setup your Twilio sandbox and how to refresh it after the three days have past.
- You learned how to setup your code so that you can send a custom reply back.
- You learned how to test your WebHook using postman.
Twilio does a really good job at keeping their documentation up to date. I would recommend checking it out if you want to know something about the API.
I hope you found this blog useful.


