
How To Deploy A Backend API To Azure
October 7, 2019
Custom App Colours In Flutter
November 8, 2019
Today I had to migrate a server for our client Xstream Connect from their hosting to our Digital Ocean droplet. Normally doing this is a pain, but with Laravel Forge and Envoyer, the process is quick and painless.
If a team has been created on Digital Ocean you need to generate an API key. Navigate to Digital Ocean API Tokens and generate a new token. The name doesn’t really matter you can always edit it, but make sure the name at least describes where the token is going.

Once the token is generated copy it and navigate to: Forge Providers
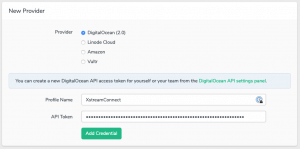
Select Digital Ocean (2.0) as the provider, add in a Profile Name, and paste the copied API Token
Then head to Forge Servers and click on the Digital Ocean icon:
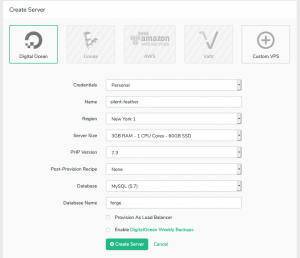
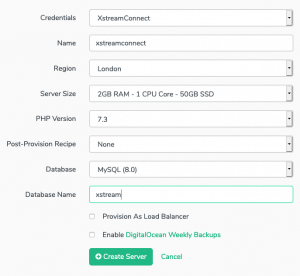
If you added a team through Digital Ocean, make sure that the credentials match the API Token you just created.
Region
The best server region for us in South Africa is London.
Server Size
The server size can be upgraded at later points (some things can’t be upgraded, so just make sure you’re selecting the correct server size by cross referencing Digital Ocean). A size of “2GB RAM – 1 CPU Core – 50GB SSD” is a fine for a few sites.
MySQL version
Any version here is fine, make sure it matches your needs though. I chose version 8.
Database name
This is just the default database, you can add this here, or wait until the server is provisioned to manage your databases and database users. I chose to wait, and manage the database once the server was provisioned.
It can take a while to build a provision the server, maybe 2 to 10 minutes on average.
While you’re waiting for the server to provision create a new project on Envoyer. Enter in the projects name, the type (typically Laravel 5/ 6/ Lumen). The only source control is Bit Bucket, the repo name should be {your bitbucket}/{your repo}.
Hopefully by now the server has been provisioned. Make sure the connection is successful.
In your Envoyer settings, navigate to the Integrations tabs, here you can add a Forge API token. In Forge, go to My Account -> API and create a new token. Copy and paste it into Envoyer. This links Forge and Envoyer, so you can just import the Forge server when viewing the project.
Before doing that though, we need to add the site on Forge.
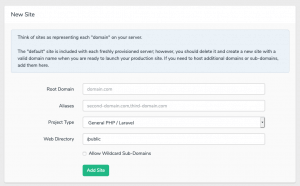
The root domain is the domain name of your site, project type is General PHP/Laravel most of the time, but the web directory should be changed to “/current/public”. If it is not, Envoyer will be deploying to the wrong directory, and the site will not work.
Once the site is added, you can head back to Envoyer and import the server using the Server name, and new Site name you just created.
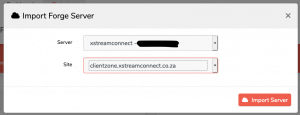
The connection might take a while to say successful, so just keep checking every minute or so.
By default Forge servers don’t allow “username:password” based authentication. You need to add your public key to Forge. Under the SSH keys tabs, where you should see Envoyer having an active key, add a descriptive name, and your public key.
Once that’s done, you should be able to SSH into the server using ssh forge@{the server’s IP address}
Use your passphrase when prompted.
To check everything has worked, deploy using Envoyer, and (using your terminal) navigate to {site-name}/current and see if your project files are there.
Next step is your environment file. In. Envoyer, under the Servers tab there is a button to “Manage Environment”. If this is your first time clicking this button, the passphrase you enter will be set. Make sure to use a passphrase that you will remember. You can update the key if need be, but you need to remember it first.
Paste in the contents of your .env file, and make sure everything is correct.
For the database portion we need to create one:
This is done easily through Forge on the Database link in the sidebar when viewing the server. I recommend adding a database user at the same time, it’s better to have users allowed to access one database only.
To connect to the database you need to use SSH authentication. The MySQL host is the IP Address of the server, the username is forge, the password is the DB password you got when provisioning the server. The SSH host is the server’s IP address once again, SSH user is forge, and the SSH key should be your private key.
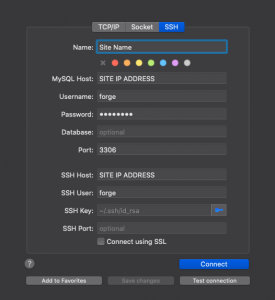
All should be right, and you should be able to see your database you created in Forge.
If all went right, you should be able to navigate to the site and have everything work.


